Updates
Multiple CNC operations at once!

Making a hell of a mess and getting stuff done!
Here you can see that I've combined operations 2 and 3 so that they get run at the same time. Operation 2 cuts out the outline of the blade, and cuts the window breaker. Operation 3 roughs out the bevels which are then finished by hand while the machine works on the next blades!
Doing it this way works out very well because it gives me enough time to do the grinding and it turns out an almost complete blade each cycle which means I can get heat treat under way without having to wait for all the blades to be done.
Still much to learn and improve upon, but I finally feel like I'm getting somewhere!
#knifeclub #knifemaking #cnc #instamachinist
Photo by Aaron Gough on July 10, 2015.
See the original post and comments on Instagram
Modifying an endmill.
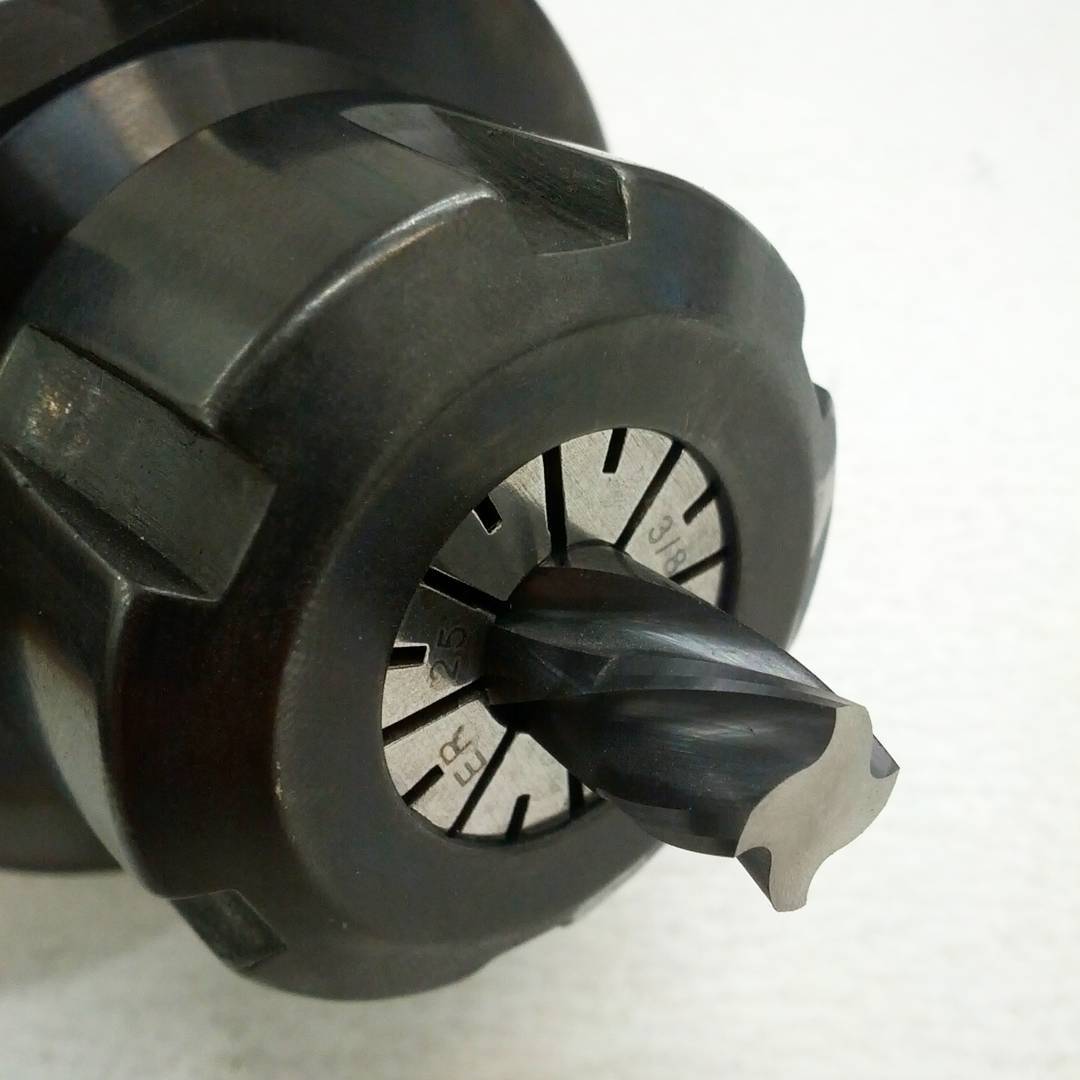
Who needs a tool and cutter grinder when you've got steady hands and a Dremel!
I needed to cut more than 1/2" off the end of this cutter so I could get closer to the cut and reduce chatter, however I don't really have anything meant for the job... What I did in the end was to get a diamond cutoff wheel for the Dremel, put the tool in the spindle and run it backwards at low speed, then ever so carefully cut the end off with the cutoff wheel running in the opposite direction.
Seems to have worked surprisingly well!
#cnc #instamachinist
Photo by Aaron Gough on July 10, 2015.
See the original post and comments on Instagram
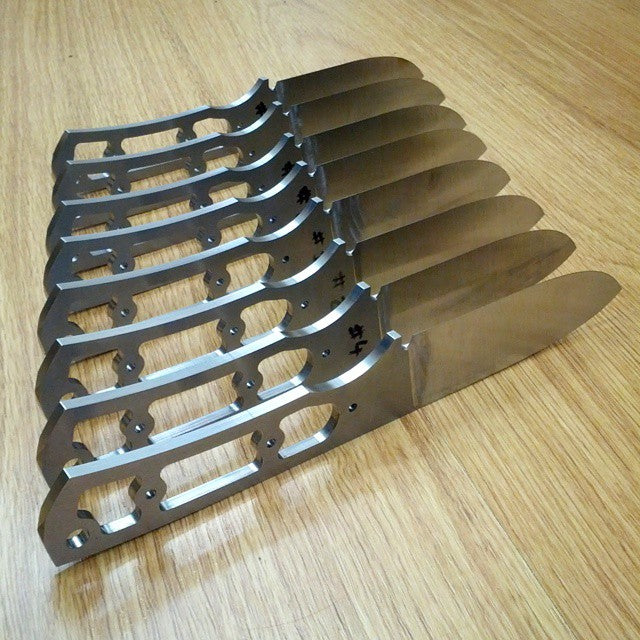
More CNC machined blade blanks!
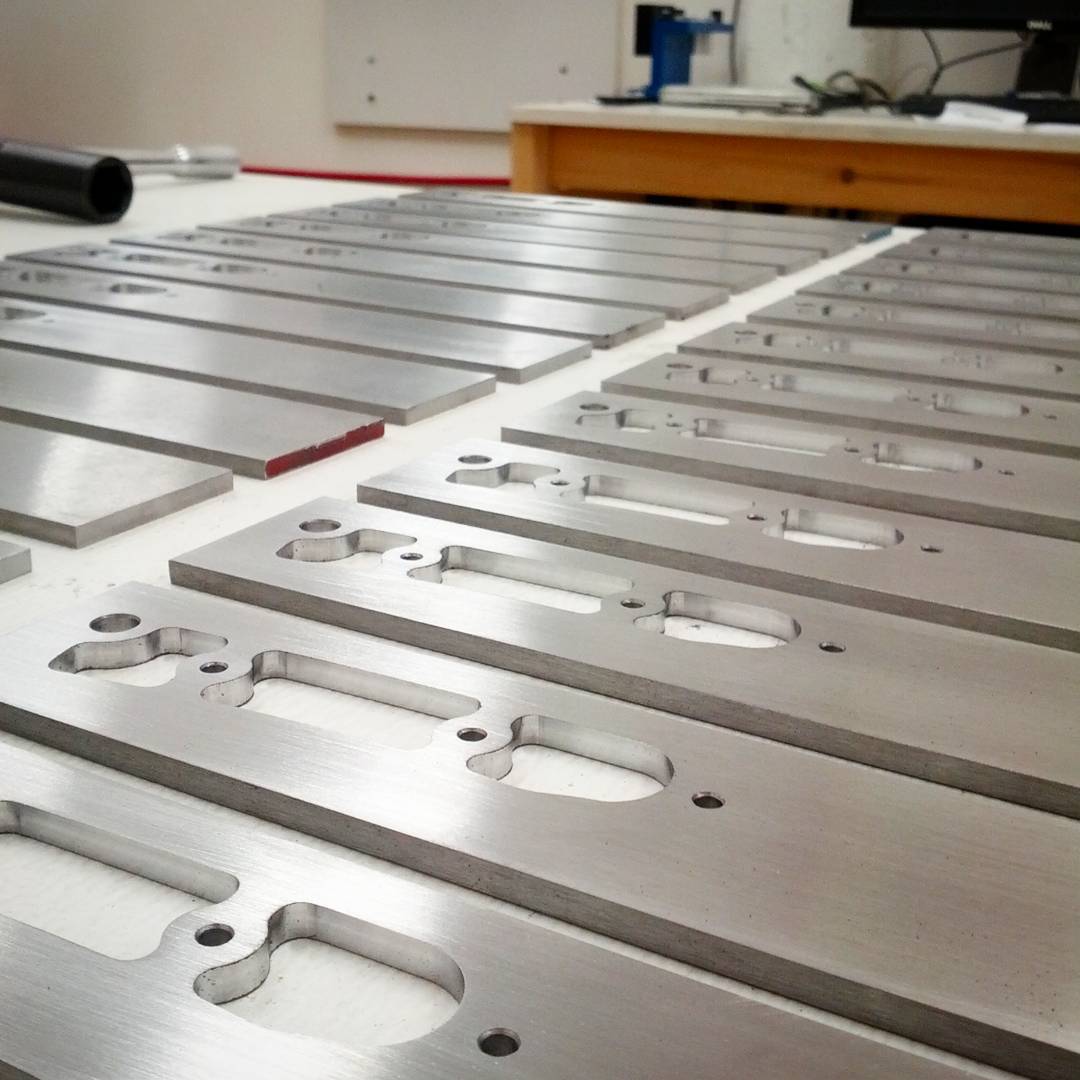
First machining operation on the first production batch done! Time for a little break then onto the next step!
#knifeclub #knifemaking #cnc #instamachinist
Photo by Aaron Gough on July 09, 2015.
See the original post and comments on Instagram
#knifeclub #knifemaking #cnc #instamachinist
Photo by Aaron Gough on July 09, 2015.
See the original post and comments on Instagram
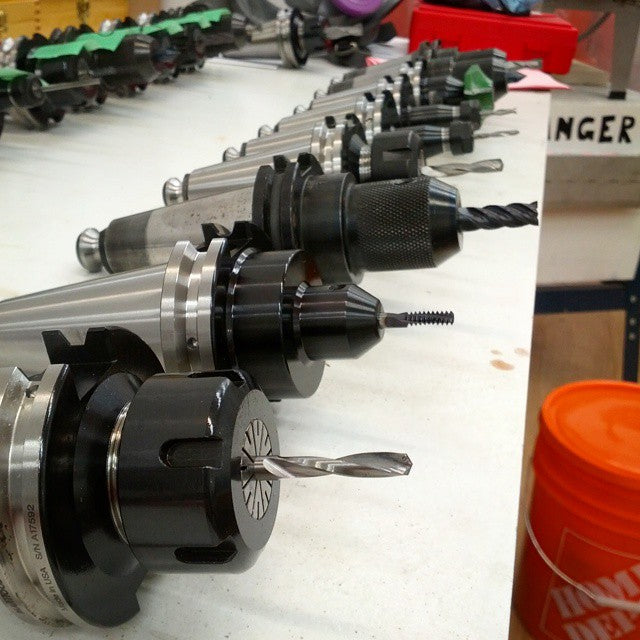
CNC tooling rack.
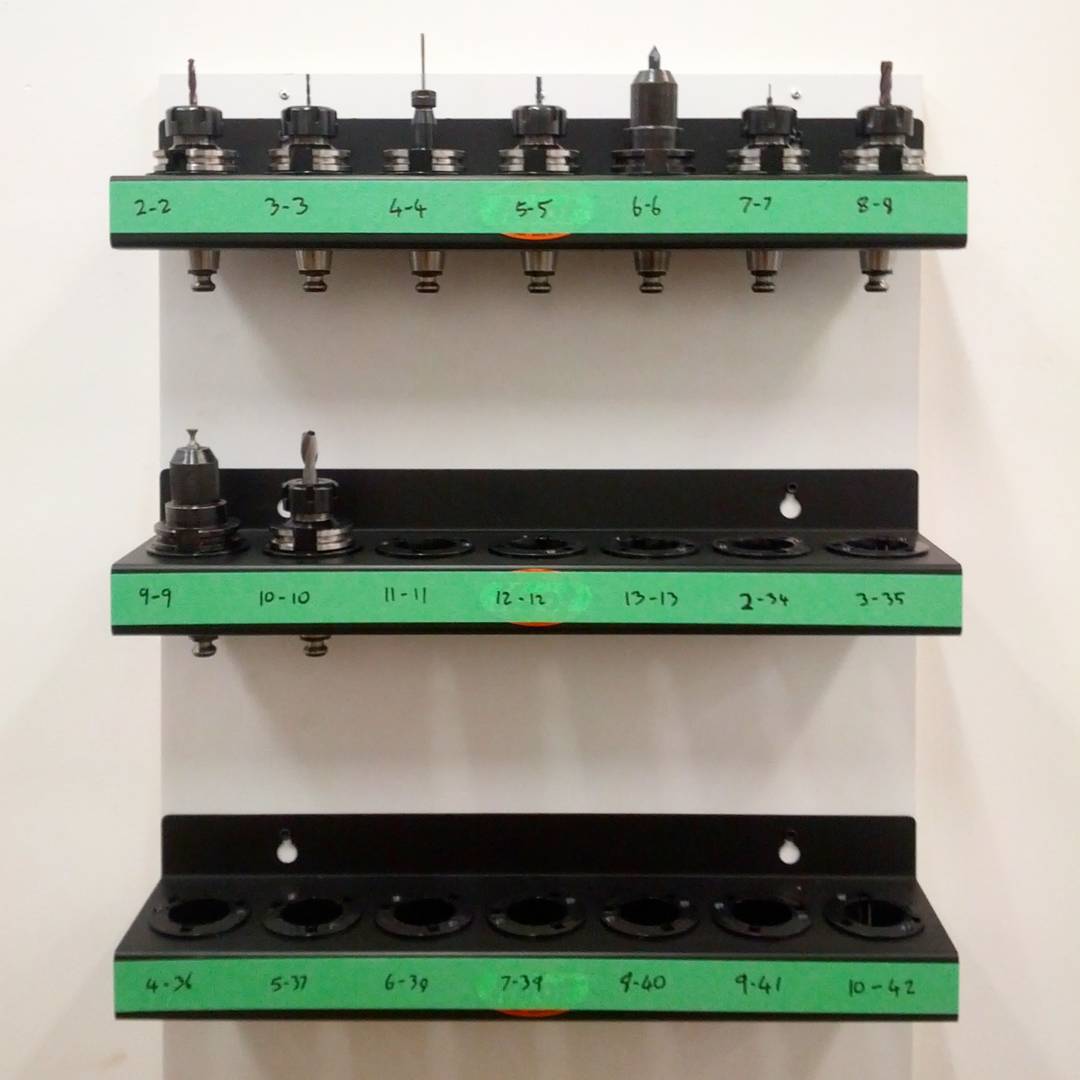
Finally got the start of a system setup for storing and organizing toolholders that aren't in the VMC!
This numbered system will allow me to easily have different tool sets that will be loaded into the machine for specific jobs. I already have 2 sets of tools, one for making the blade and tang, and another for making the handles.
The reason for this is because those two parts take more tools to make them than the machine can hold at once... #knifeclub #knifemaking #cnc #instamachinist #machineshop #machining
Photo by Aaron Gough on July 09, 2015.
See the original post and comments on Instagram
Heat-treating prototype blades!

Doing heat treat today for the prototype batch of knives, immediately after this photo was taken I donned thick leather gloves and IR protective glasses and then removed all the blades using tongs so they could be hung up to air cool.
I always forget how long heat treatment takes!
At least an hour and a half to 2 hours for the kiln to get up to full temperature, then 35 minute soak time at 1775°F, then out they come for the air quench, usually takes 10-15 minutes before they're cool enough to handle. Then first temper for 2 hours, then one hour in sub zero treatment, them second temper.
All up time in the past was usually close to 12 hours because you have to wait for the kiln to cool before tempering and so on. Should be faster with the 'frankentoaster' but it will still take 8+ hours most likely!
Worth it given how well the blades come out!
I have an idea I've been kicking around for a kiln that will do an automated compressed gas quench as part of the cycle, which would make the whole process efficient and consistent. Maybe in a few months I'll get cracking on that!
#knifeclub #knifemaking #knife #knifemaker
Photo by Aaron Gough on July 07, 2015.
See the original post and comments on Instagram
Cerakote curing in a toaster...
'Frankentoaster' is finally done! This is not your ordinary toaster! I fitted it with an industrial temperature control system so it can hold temperature precisely enough to be used for tempering knives and for baking Cerakote!
It holds temperature to within a degree or two, and I have double checked that the temperatures are accurate with a separate temperature meter.
It's built around an inexpensive PID controller I bought off amazon, it uses a solid state relay to turn the elements on and off. There is a fan that was originally part of the toaster that circulates air within the chamber to help keep the temperature more even.
The chamber only has about a 15°F temperature gradient from top to bottom which is pretty amazing given how low tech this thing is!
I also installed a fan in the bottom electronics enclosure, it was supposed to keep the electronics cooler, but it accomplished the opposite as it was moving around hot air from the inner wall that would have otherwise simply risen away from the electronics! Live and learn on that one! The fan will be removed shortly!
Custom tools like this and (soon) my sandblaster will help make me more efficient and make the processes more enjoyable!
#knifeclub #knifemaking #heattreat #diy
See the original post and comments on Instagram
Sandblasting cabinet day!
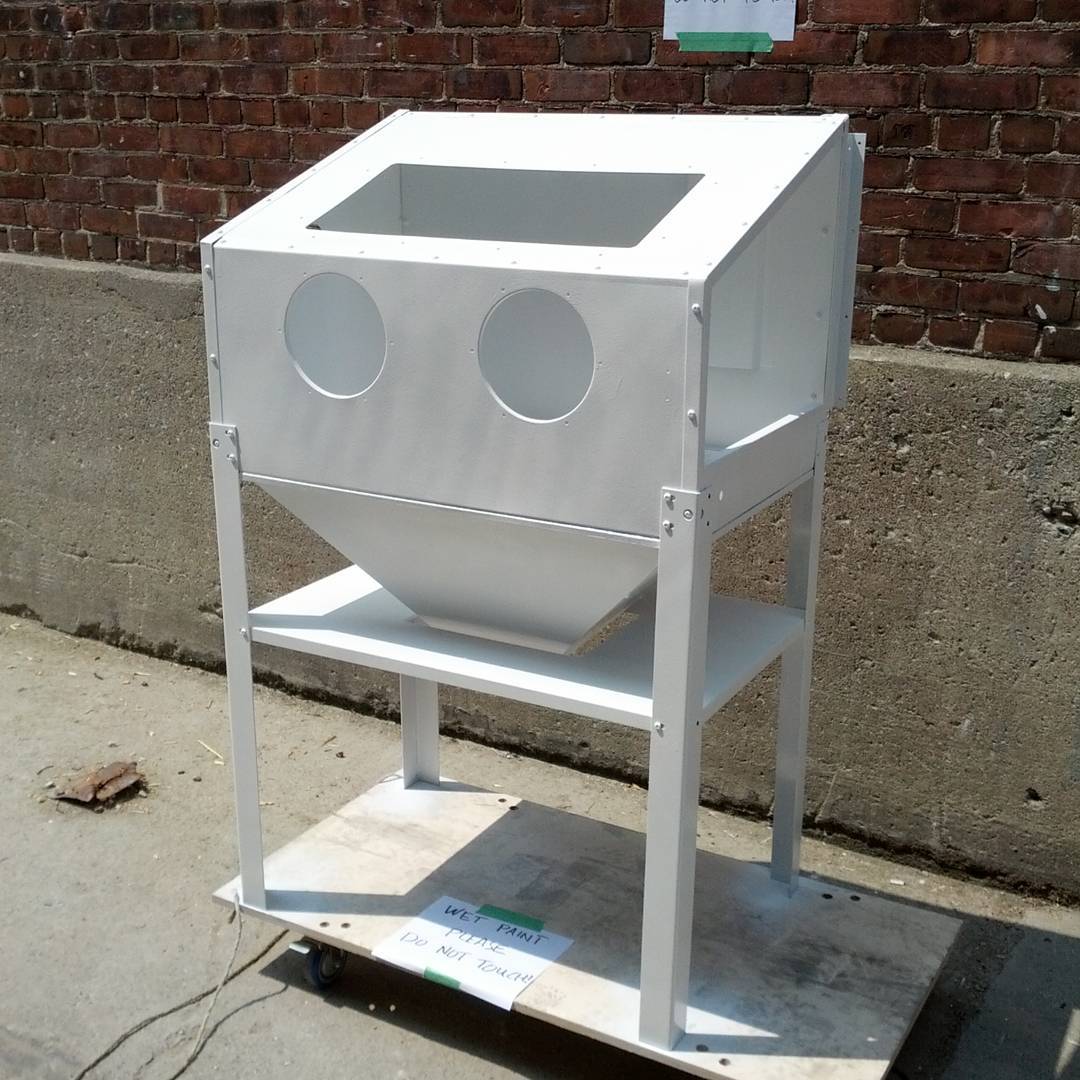
Working on the sandblaster today! I bought a cheap cabinet and then a good siphon gun and lighting system and so on to go inside it.
The cabinet as I bought it was dark blue inside and out, which isn't really conducive to seeing workpieces well! I sanded all the parts before assembling it and then painted it white after assembly... At first I tried to use a paintbrush and roller to paint it, wish I hadn't done that. It has too many nooks and crannies for that to work effectively. Ended up spray painting it with rattle cans for the second coat. Really not the best paint job I've ever done, oh well, live and learn!
The sandblaster will be used in combination with 120 grit aluminum oxide to sandblast the knives in order to prep them for Cerakote.
Photo by Aaron Gough on July 04, 2015.
See the original post and comments on Instagram
Tooling for machining handle scales.
Setting up all the tooling for machining the handle scales! It requires 9 separate tools to make them in an accurate and quick manner!
It takes 8 tools to machine the blade and tang, and a few more will be required to machine the sheaths. All of that combined means I've already run out of space in the toolchanger on the VMC! Crazy!
I'll solve that issue by setting up different 'sets' of tooling which will be loaded for a specific part of the production process, a little less convenient but it should work out well!
#cnc #instamachinist #knifeclub #knifemaking
Photo by Aaron Gough on June 27, 2015.
See the original post and comments on Instagram
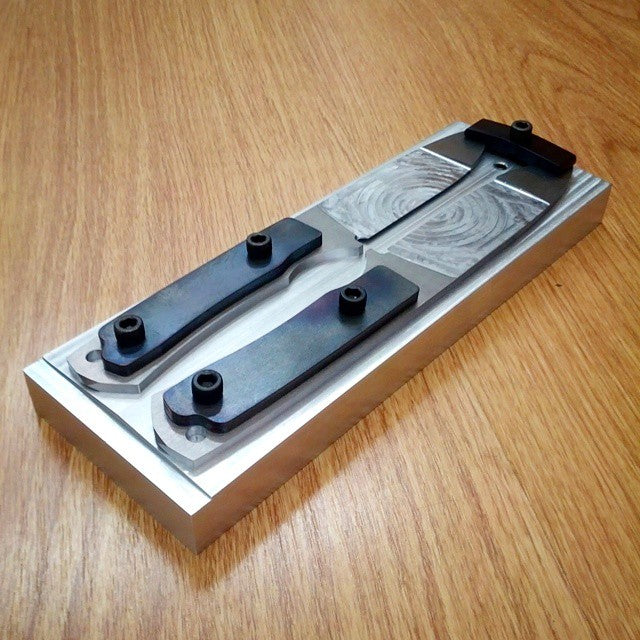
Prototype batch of Resolute MkIII blades!
Finish grinding is done on the prototype batch! These blades are all going to be Cerakoted, so no need to go to a higher grit than this on the grinder.
Grinding the tips and blending the bevel in was very quick and painless, the process really does seem to be coming together!
Next step for these is heat treat, then sandblasting, then coating. Might do a light tumble after heat treat just to round the edges a miniscule amount, not sure on that yet. The very light machining marks left near the plunge line will disappear the second the sandblaster hits them!
Exciting stuff guys!
#knifeclub #knifemaker #knifemaking
Photo by Aaron Gough on June 26, 2015.
See the original post and comments on Instagram
Completed bevel machining fixture!
Finally finished all the clamps for the bevel fixture! Each clamp has specific machining and bending to make it contact the blades where I need them to.
The tang clamps are bent about 0.050" near their tips to ensure they press down as closely to the plunge line as possible. The tip clamp is bent so that only it's ends touch, and they do so along the middle of the blade to make sure the blade tip is well pinned against the fixture!
The tip clamp is quite stout at 1/4" thick and only 2" long, I had to heat it to 1700°F before bending it!
The tip clamp also has machining on the underside to provide a recess so that it sits on the blades in a specific location. Without that the clamp might end up in the wrong position and get in the way of a tool!
The two tang clamps are made from A2 and the tip clamp is made from 5160. All were hardened and then spring tempered. I love the blue color that the spring temper produces!
The fixture now consists of 4 unique components (not including the fasteners), in total the parts required 11 separate setups to make and usually several machining operations per setup! No wonder it's taken me almost 3 days!
#knifeclub #knifemaking #cnc #instamachinist #machineshop
Photo by Aaron Gough on June 25, 2015.
See the original post and comments on Instagram